 |
|
|
|
 |
|
 |
|
 |
|

|
|
|
|
|
|
|
|
|
|
|
|
|
|
 |
|
 |
|
 |
|
| EZ Maintenance for Windows |
|
| EZ Maintenance™ is also
available as a Windows's
program for the user seeking
a flat priced maintenance
software solution.
|
| |
 |
| Partial Client List |
|
| EZ Maintenance™ for Windows
|
| EZ Maintenance™ WEB |
| |
|
|
|
| Features |
|
- Schedule All Maintenance
- Equipment & Vehicles
- Full Inventory Control
- P.O.s, RFBs, Invoices
- Work Orders, Bar Coding
- Emergency Work Orders
- Email Alerts
- QuickBooks Link
- Send Work To Vendors
- Customer/Vendor Tracking
- Track Customers
- Maintenance Histories
- Access Passwords
- Supervisory Control
- And Much More!
|
|
| Contact Information |
|
Pinacia Inc.
5699 Kanan Road, #349
Agoura Hills, CA USA 91301
Phone: (818) 396-8550
Sales Support: ext. 1
Tech Support: ext. 2
Fax: (818) 396-3524
info@pinacia.com
|
|
|
|
|
|
|
 |
Click Here to see a demonstration video on Tracking and Controlling Your Inventory.
Viewing Your Inventory Items
EZM Web CMMS software also has a complete inventory management module. You
can enter a virtually unlimited amount of inventory items into EZM Web and
track their quantities.
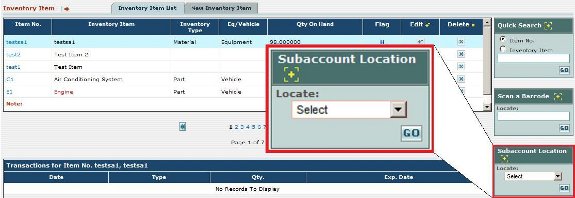
Here is a portion of the page at which you can see all of the inventory
items you've entered into EZM Web so far:
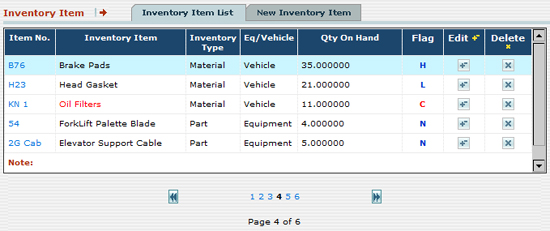
For each inventory item listed here, you can see the following
information:
- The item's unique identifying code.
- Whether it is a material or a replacement part.
- Whether it is for equipment maintenance, vehicle maintenance, or
both.
- What the quantity you currently have on hand is.
- Whether the quantity on hand is high, normal, low, or critically
low.
In addition, you can track each time a quantity of an inventory item is
checked out, checked in, or returned as unused. If you select an inventory
item from the list, the complete record of transactions is displayed
below:

Whenever you use an inventory item, whether it be a material or a
replacement part, in a work order, a check out transaction is automatically
created and the quantity used is automatically deducted from inventory.
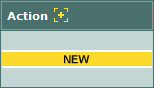
Entering New Inventory Items
To enter a new inventory item, you just click on the NEW button on the right
side of the page:
This takes you to this page where you enter the details of the new inventory
item:
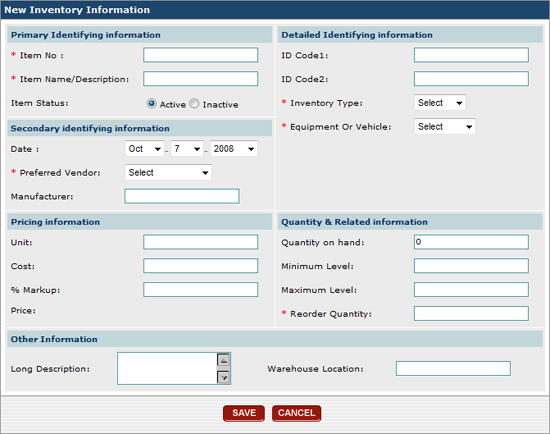
Here you can enter the following information about the inventory item:
- Primary Identifying Information: its unique
cataloguing code and its name.
- Secondary Identifying Information: the date on
which the item was added to inventory, the preferred vendor for that
item, and its manufacturer.
- Pricing Information: the units in which quantities
are measured, its cost, and the markup you charge to use in
maintenance.
- Detailed Identifying Information: additional
identification codes, whether it is a material or replacement part,
and whether it is used in equipment or vehicle maintenance, or both.
- Quantity & Related Information: the current
quantity on hand, the minimum level allowed, the maximum level
allowed, and the quantity at which the item is reordered.
- Other Information: a long description of the item
and its warehouse location.
See Only Inventory for Your Subaccount
EZM Web lets you create Subaccounts which:
- are separate EZM Web accounts for subdivisions of your company
- have their own equipment and vehicles
- are linked to your main EZM Web account
The main account and any subaccounts which are associated with it all share
the same inventory items. However, you can set the application so that only
the inventory items for a given subaccount are displayed.
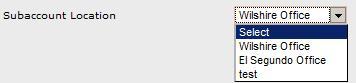
At the screen where you enter the information for a new inventory item,
there is an option that lets you select which subaccount the inventory item
belongs to:
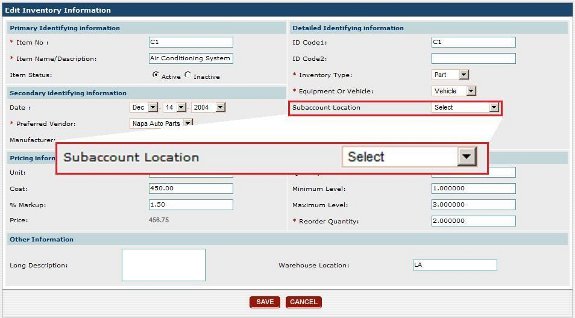
This is done using the Subaccount Location drop-down box
shown above. You just use this drop-down box to select the subaccount
location you want the inventory item to belong to:
At the list of inventory items, there is a selection box called Subaccount
Location which is on the right side of the screen:
This selection box lets you see only the inventory items belonging to a
particular subaccount; for example, you can select your subaccount and see
only the inventory belonging to your subaccount:
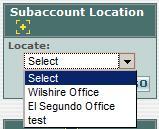
Once you select the desired subaccount, then the list of inventory items is
updated to show only the inventory items belonging to the subaccount you
selected.
As mentioned above, you set the subaccount location for an inventory item at
the screen where you enter all of the information for the inventory item.
You can make the entry of what subaccount the inventory item belongs to a
mandatory or an optional entry. In other words, if you make it mandatory,
the user must select a subaccount that the inventory item belongs to. If you
make it optional, they do not.
The setting that lets you select whether the subaccount location is
mandatory or optional for an inventory is set within the
Preferences section of the application:

The Inventory Item Owner option lets you select whether the
subaccount location is mandatory or optional. Choosing On
makes it mandatory, while choosing Off makes it optional.
|
|
|
|
|
|
|
|


 Introduction