 |
|
|
|
 |
|
 |
|

|
|
|
|
|
|
|
|
|
|
|
|
|
|
|
|
|
|
|
|
 |
|
 |
|
 |
|
 |
|
| EZ Maintenance for Windows |
|
| EZ Maintenance™ is also
available as a Windows's
program for the user seeking
a flat priced maintenance
software solution.
|
| |
 |
| Partial Client List |
|
| EZ Maintenance™ for Windows
|
| EZ Maintenance™ WEB |
| |
|
|
|
| Features |
|
- Schedule All Maintenance
- Equipment & Vehicles
- Full Inventory Control
- P.O.s, RFBs, Invoices
- Work Orders, Bar Coding
- Emergency Work Orders
- Email Alerts
- QuickBooks Link
- Send Work To Vendors
- Customer/Vendor Tracking
- Track Customers
- Maintenance Histories
- Access Passwords
- Supervisory Control
- And Much More!
|
|
| Contact Information |
|
Pinacia Inc.
5699 Kanan Road, #349
Agoura Hills, CA USA 91301
Phone: (818) 396-8550
Sales Support: ext. 1
Tech Support: ext. 2
Fax: (818) 396-3524
info@pinacia.com
|
|
|
|
|
|
|
Previous
Section:
 Setting
Up EZ Maintenance Setting
Up EZ Maintenance |
Next
Section:
Creating
Work Orders |
|
/video/
|
| Viewing
and Entering Equipment |
Viewing List of Entered Equipment
To get a listing of all the equipment that has been entered into the system,
you simply click the "Equipment To Maintain" link from the Equipment
Maintenance menu in the left side navigation bar.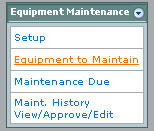
The equipment appears in a listing similar to the one shown here:
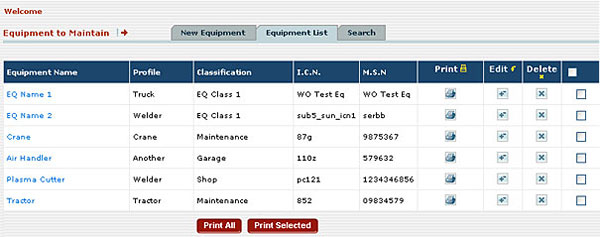
This screen displays information on each piece of equipment that has been
entered into EZM Web.
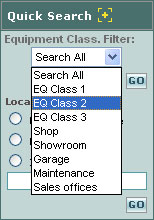 Equipment Class Filter The "Equipment
Class Filter" under the Quick Search box to the right is where you can
filter your equipment listing to show only certain pieces of equipment based
on their classification if you choose to. Simply choose the specific Class
Filter from the drop-down menu, click "go", and only the equipment that has
that classification will be displayed. Equipment Class Filter The "Equipment
Class Filter" under the Quick Search box to the right is where you can
filter your equipment listing to show only certain pieces of equipment based
on their classification if you choose to. Simply choose the specific Class
Filter from the drop-down menu, click "go", and only the equipment that has
that classification will be displayed.
Locate By You can quickly locate a
piece of equipment if you already know a certain detail about it by using
the "locate by" function which is also located in the quick search box. Just
select the criteria you want to search by, type in the information and press
"go".
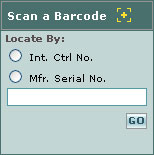 Scan a Barcode to Locate Select the
Barcode scan format, (Either Internal Control number or Manufacturer Serial
number) then scan the equipment Barcode, and click Locate. This will bring
you to the equipment whose barcode you've scanned. Scan a Barcode to Locate Select the
Barcode scan format, (Either Internal Control number or Manufacturer Serial
number) then scan the equipment Barcode, and click Locate. This will bring
you to the equipment whose barcode you've scanned.
|
Entering New Equipment To create a
new Equipment Record in EZM Web, you simply click the "New Equipment" tab
and you'll see this screen.
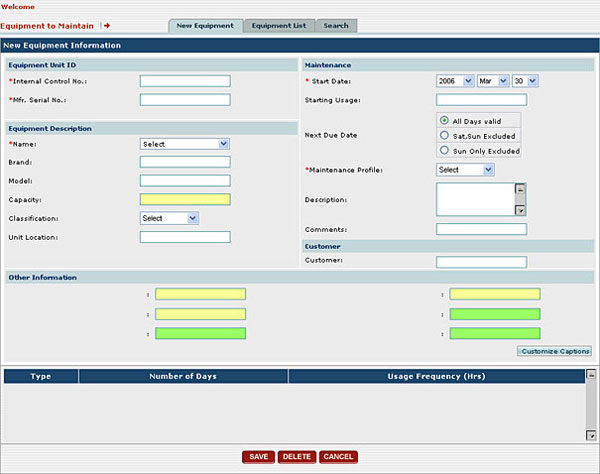
The following fields are required and should have information in
them.
Internal Control Number: This is an
identification number assigned to a particular piece of equipment.
Manufacturer's Serial Number: This is
also a required field but if this information is not available, simply make
it the Internal Control Number.
Name: Here you select one of the
equipment names that were created in the equipment Setup Menu from the drop
down menu.
Start Date: All maintenance is
scheduled from this date forward based on the frequencies that were provided
in the equipment's profile.
Maintenance Profile: (previously
created in the SETUP menu) When adding a piece of equipment, by simply
selecting the corresponding Maintenance profile, EZM Web will automatically
schedule all the various preventive maintenance events that need to be done
for that particular kind of equipment, thus saving a great deal of time and
trouble in setting up equipment.
THE OTHER FIELDS IN THIS SCREEN ARE OPTIONAL
Customize Captions: This option allows
you to input your own fields to describe your equipment even further. For
example, if you wanted to enter in a Warranty Date field where your
operators would have to fill out the date, you would create the field with
this feature.
Click here to view
sample reports. |
Previous
Section:
Setting
Up EZ Maintenance |
Next
Section:
Creating
Work Orders |
|
|
|
|
|